
Write the stick.
Any USB stick of 128 MB or more. Writing erases everything on it. Windows with Rufus first; balenaEtcher and dd below.
Windows: Rufus
01Download the image
memburn-0.9.5-usb.img from this page or the GitHub release.
Get Rufus from rufus.ie
Download it from rufus.ie only; its download links go to GitHub. Look-alike download sites can bundle other software. Or, in a terminal:
winget install Rufus.RufusStandard or portable: both are one
.exewith nothing to install. The portable one keeps its settings in arufus.inifile next to it.Rufus 4.15, June 2026. Its file properties show the signer Akeo Consulting. Windows asks to let it make changes: Yes. On first start it may ask whether to check for updates online; either answer works.
Plug in the stick
128 MB or more. Copy off anything you want to keep.
Write it
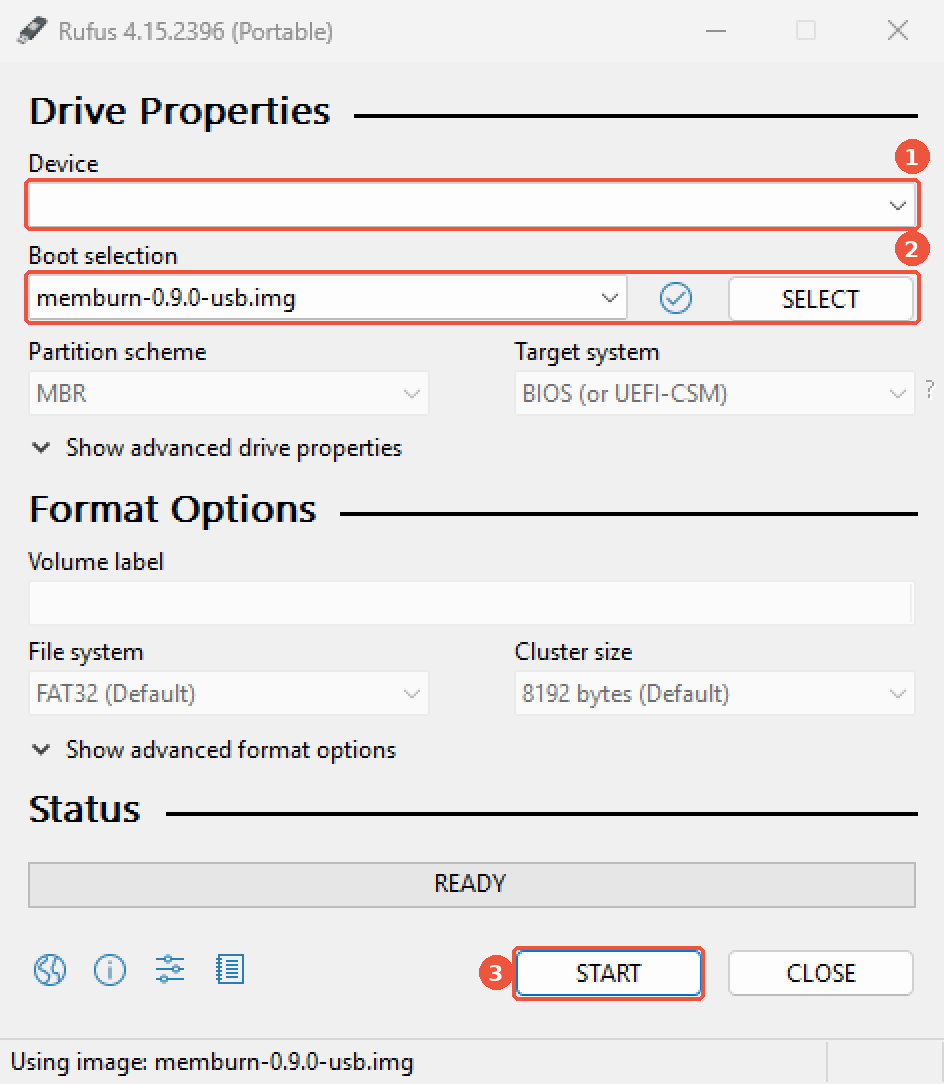
- 1 Device: the stick. Check its size.
- 2 Boot selection: Disk or ISO image, then SELECT and pick the
.img. - 3 START, then OK to erase the stick.
Rufus greys out Partition scheme and Target system for a disk image and writes it byte for byte; leave them. If it asks how to write the image, choose Write in DD Image mode.
Everything on the selected device is erased. If more than one USB drive is plugged in, unplug the others first.
Eject the stick
When Rufus shows READY, close it and eject the stick in Explorer.
Boot it
02Open the boot menu
Plug the stick into the PC to test, switch it on and press the one-time boot menu key straight away.
Pick the stick
Choose the entry that starts with UEFI and names the stick. Secure Boot can stay on.
GRUB, 5 s
GRUB starts
memburn 0.9.5after 5 s. Linux then checks memory for about 6 s per 16 GiB while GRUB's text stays on screen.The menu
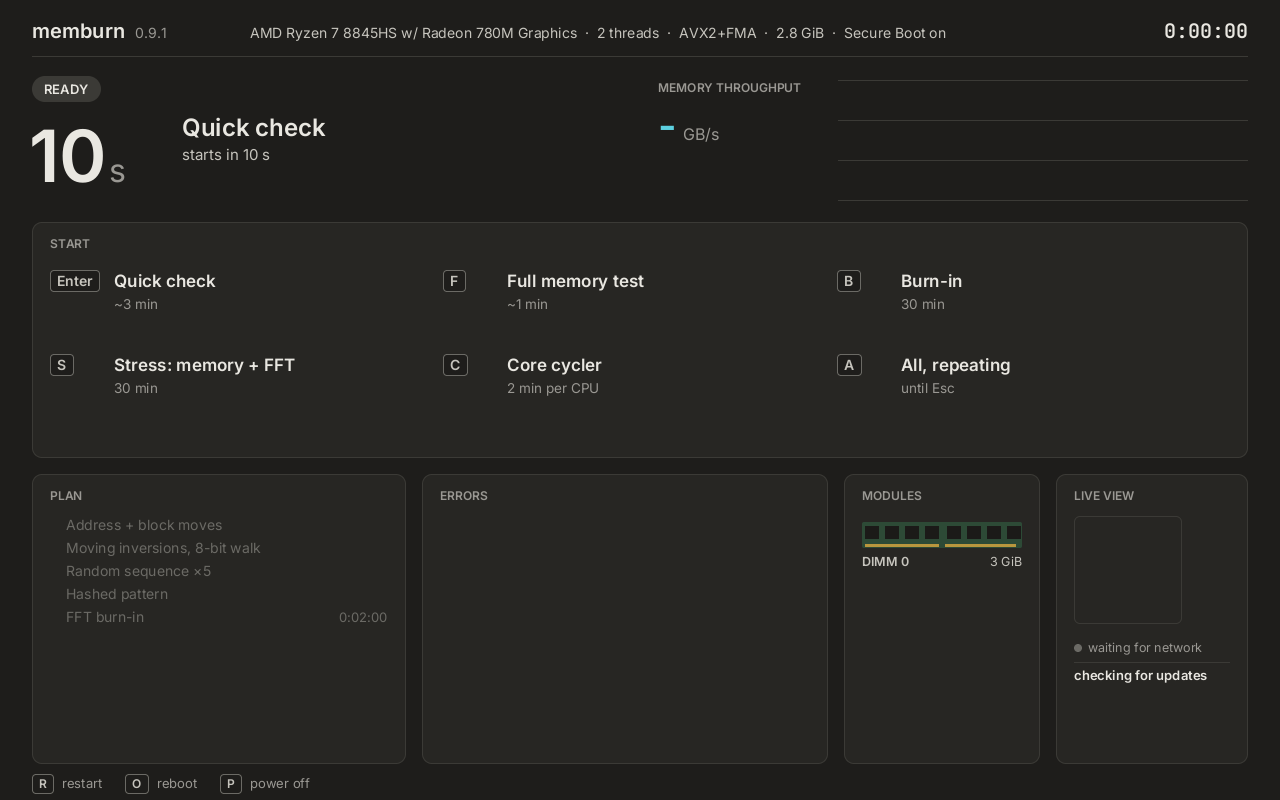
The quick check starts after 10 s. Enter starts it now; F, B, S, C and A pick another mode.
| Board or PC | Boot menu key |
|---|---|
| ASUS | F8 |
| MSI, ASRock | F11 |
| Gigabyte, Dell, Lenovo, Acer | F12 |
| HP | Esc, then F9 |
| Other | The key shown on the first screen, often F10, F11, F12 or Esc |

Troubleshooting
03The stick is not listed
The stick boots in UEFI mode only. In the firmware setup, turn off a CSM-only or legacy-only boot mode. Try another USB port, ideally one on the back of the board.
Secure Boot violation
Only the second GRUB entry, bare-metal UEFI, needs Secure Boot off. Pick the first entry, or turn Secure Boot off for that one.
Black screen
Some PCs show the boot only on one GPU. Connect the display to the graphics card or board output the firmware screen appears on.
Other ways
04balenaEtcher
Windows, macOS, Linux. In balenaEtcher: Flash from file → the .img, Select target → the stick, Flash!
Linux: dd
lsblk  # the stick: e.g. sdb, not sdb1
sudo dd if=memburn-0.9.5-usb.img \
  of=/dev/sdX bs=4M conv=fsync \
  status=progress
macOS: dd
diskutil list  # external, physical
diskutil unmountDisk /dev/diskN
sudo dd if=memburn-0.9.5-usb.img \
  of=/dev/rdiskN bs=4m
diskutil eject /dev/diskN
A wrong disk name erases that disk. Check the size in lsblk or diskutil list first.